This post contains some affiliate links/discount codes.
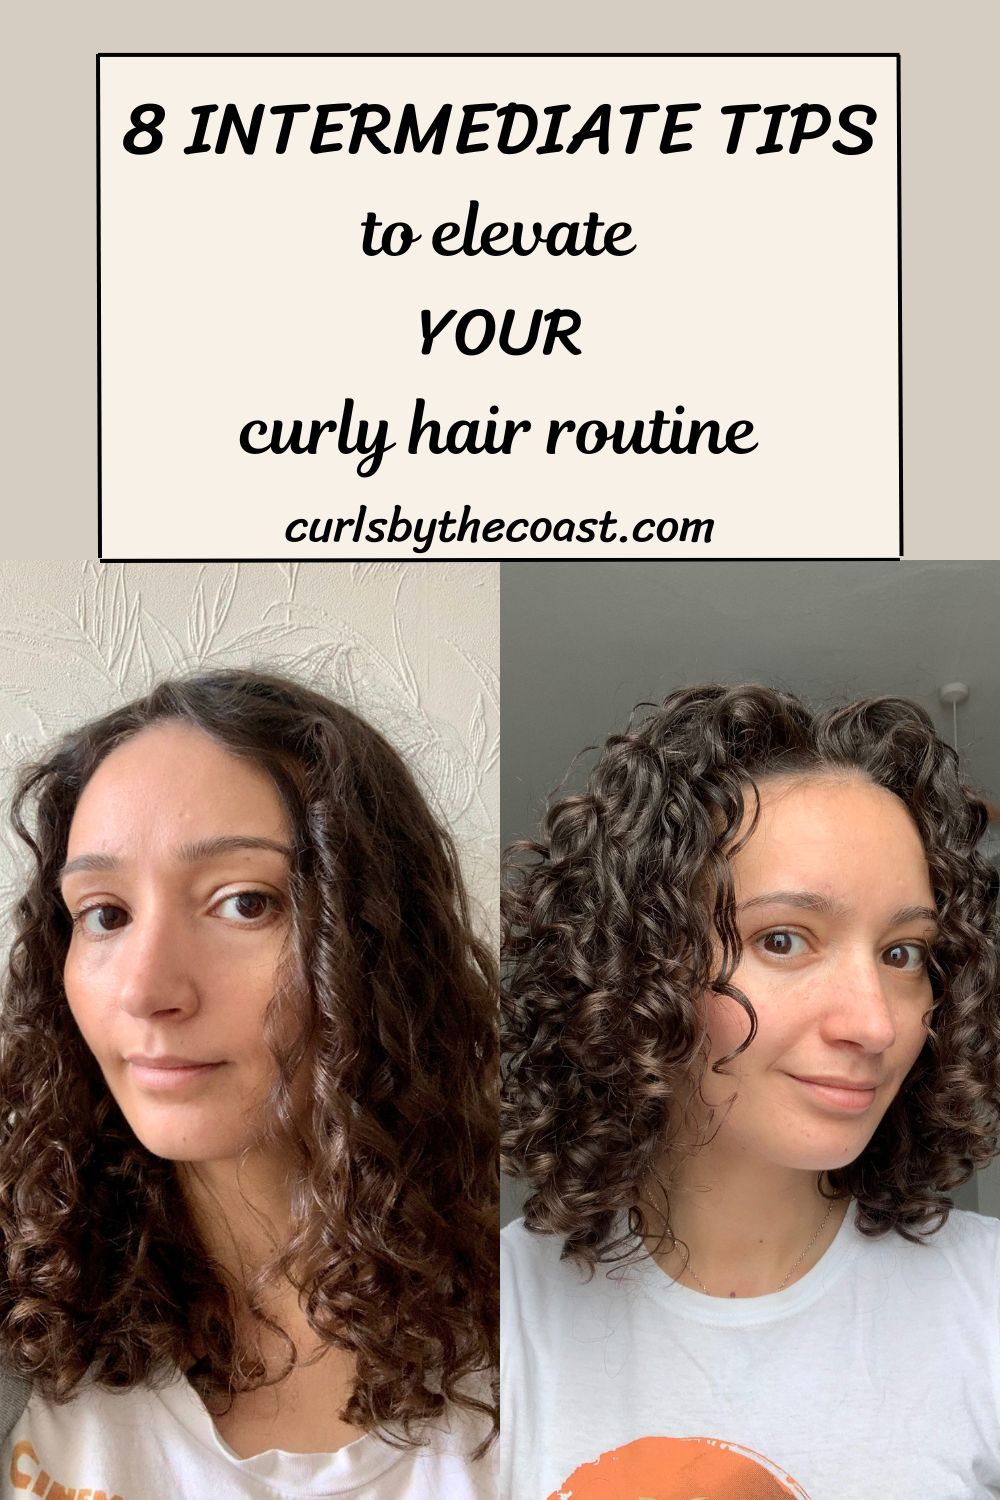
When I was about 6-7 months into my curly hair routine, I was finally getting the hang of how to handle my hair and apply products in the best way to get consistent results.
This is when I started adding smaller tweaks, like root clipping, wet plopping, and finally foraying into the confusing world of protein. 😨
That’s why I’ve called these tips “intermediate” – they aren’t all essential, but they’ve helped me get the most out of my curly routine and also move me more towards the style in which I like wearing my curls – which is what it’s all about!
These tips ensure my curls last as long as they can, with the best volume and definition they can get too.
Incorporate protein
Hearing about the function of “protein” in curly haircare can be confusing and even daunting, but the easiest way to think about it is: protein gives curls strength and structure. Therefore if your curly hair is fine, limp, and/or damaged, it might be worth incorporating some protein into your routine. Check out my post about the protein-moisture balance for everything you need to know!
My favourite way to add protein to any product: Bouclème Protein Booster (get 15% off with code COAST15)
Wet plop before diffusing
Are you still not getting the hold you’re expecting with your curl stylers? Perhaps one of the reasons is because you’re removing too much product when you’re trying to remove water from your hair with your towel.
Try wet plopping: this means putting a shower cap on your head for a few minutes after you’ve applied your stylers and finished all your styling. This gives your stylers a chance to adsorb to your hair.
After a few minutes, take the shower cap off, and squeeze out any excess water from your hair with your flat-weave towel. Now you’re ready to dry!
My favourite shower cap: Amazon
Root clip to boost volume

Root clipping is handy if you struggle to get volume, or if you have roots that are softer or a looser curl pattern than the rest of your hair.
I like to do it when my hair is about 80% dry: I either clip metal ones around my parting, or I take the lazy route and put a big claw clip across my parting. I only take them out when my hair is 100% dry!
My preferred root clips: metal clips / claw clips
Sort out your sleep protection

Lots of beginners learn how to style their curly hair just fine, but as soon as they sleep on it, they wake up with frizz and wonky curls. Sleep protection is a must to preserve the longevity of your curls! There are lots of different ways to protect your curls while you sleep, and I cover some of them in this post.
My personal favourite way is to wear a jersey buff, and sleep on a silk or satin pillowcase.
My favourite buff: Bambonn Haircare (also available on Etsy)
My favourite satin pillowcase: Tréluxe (get 15% when you buy through this link)
Learn what kind of refresh works best for you
The next step in preserving curly hair after sleeping on it is to learn what kind of refresh methods your curls like best! If you’ve just got a bit of halo frizz, you could get away with a dry refresh, whereas if your curls are flat, maybe steam would work for you. Check out my post about different refresh methods and try something new!
My preferred mist spray bottle: Amazon
My preferred steamer: Amazon
Avoid glycerin in wet/humid weather
Glycerin is a great humectant that’s found in lots of hair and skin products due to its ability to attract moisture – but some curlies find that in very wet or very dry weather, high-glycerin products actually cause more frizz, as the glycerin seeks out more moisture from the air.
Because I live in a very rainy climate, I find that using glycerin-free stylers stops my curls from exploding in the damp air. Instead, my favourite stylers contain film-forming humectants like aloe and polymers, which help seal in your hair’s moisture as well as keep extra moisture out.
My favourite glycerin-free stylers: TréLuxe Hi! Definition Styling Gel (get 15% off when you buy through this link)
Ouidad Advanced Climate Control Gel
Get a haircut that works for your curl pattern
I used to really want long hair, and was advised by previous hairdressers to not get layers cut in case my curls sprang up (perish the thought!). I’ve realised now, though, that shorter hair gives me a volume boost. Because my curls are naturally more bottom-heavy, the longer my hair gets, the more “triangular” my hair looks, and the more weighed down my roots get.
A rounder shape with a couple of shorter layers works for me, but if you have lower-density hair, you might prefer a blunter cut so that the bottom of your hair doesn’t look thin and straggly. Meanwhile, if you have much thicker hair, certain layers will make your hair look blocky. Have a chat with your stylist about what look you want to achieve (or avoid) – and bring photos for inspiration too!
If you’ve been wondering about getting a curly cut, check out my post Everything you need to know about curly haircuts.
And most importantly…don’t stress about frizz!
The most important (and perhaps hardest) tip! Please don’t forget that frizz is part of your hair’s natural texture. You can’t eliminate it, you can only reduce it (however temporarily). So don’t feel bad if the halo frizz is creeping up, or if your curls aren’t uniform. To really push through the “beginner” phase of curly haircare, you need to embrace the imperfection of your hair, too!
To prove it, here are 5 things I had to accept about my own curly hair…

Share your thoughts…